
 Bookmark
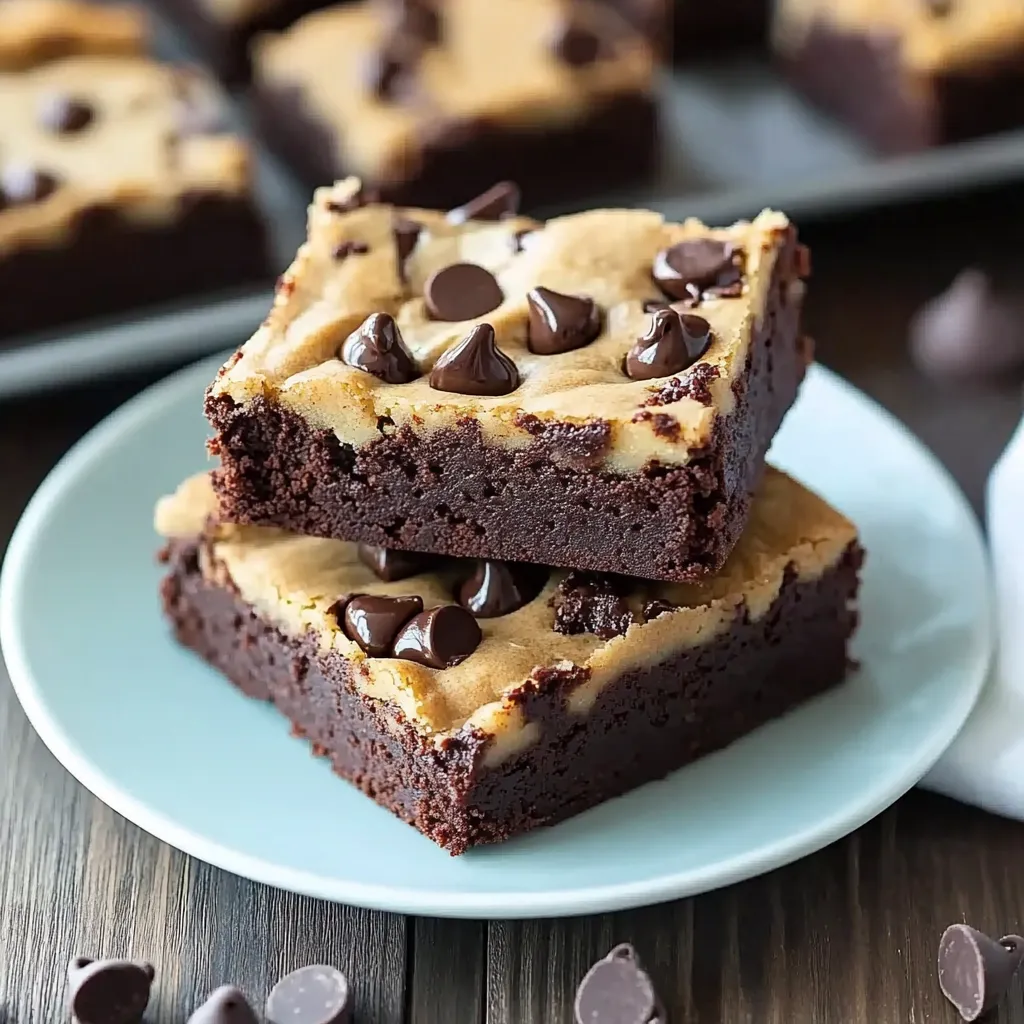
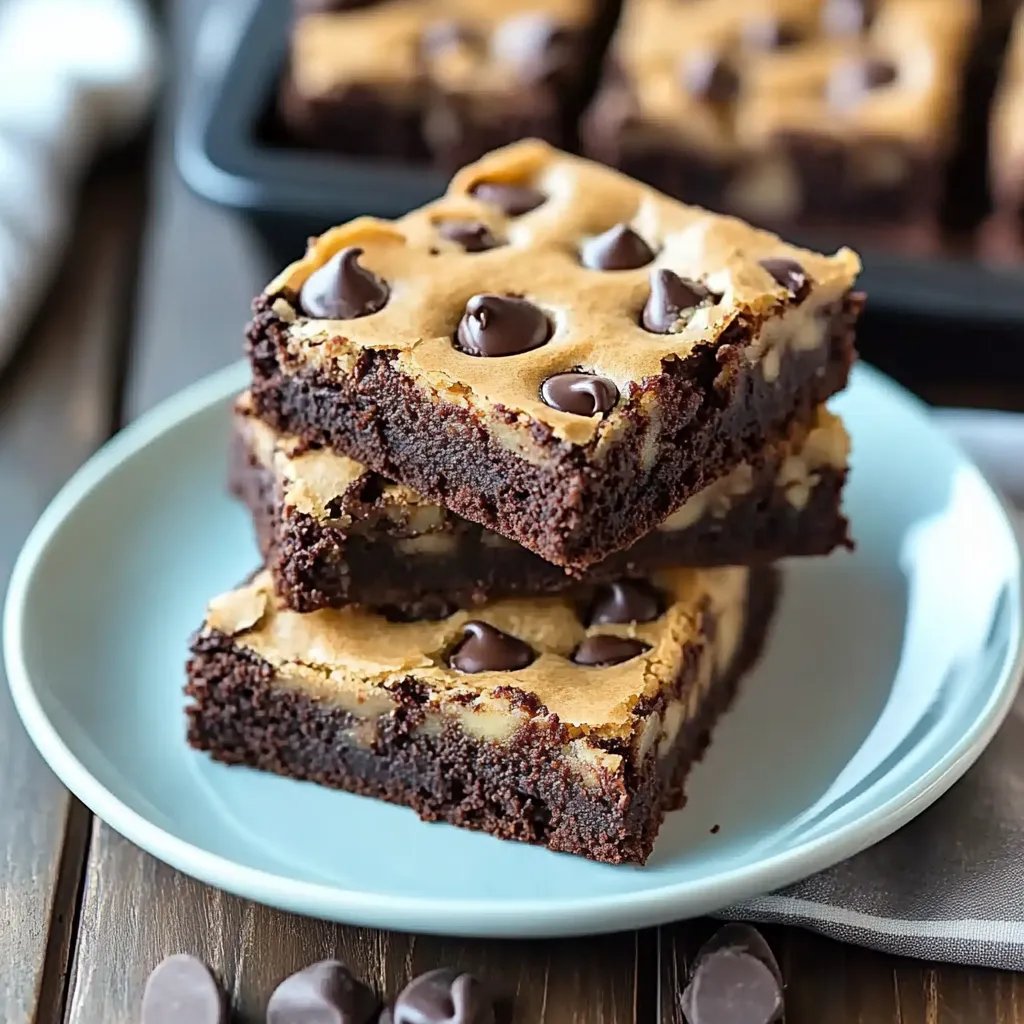
This ultimate chocolate chip cookie brownie hybrid delivers pure indulgence in every bite. The fudgy brownie base supports a buttery cookie layer, creating a dessert that satisfies both chocolate lovers and cookie enthusiasts at once.
I created this recipe during a baking day with my niece when she couldn't decide between brownies and cookies. The combination was so spectacular that it's now requested at every family gathering and has become our signature dessert gift for new neighbors.
Ingredients
- For the Brownie Layer
- Unsalted butter Creates a rich foundation for the brownie layer
- Granulated sugar Provides sweetness and contributes to the chewy texture
- Large eggs Bind the ingredients while adding moisture
- Vanilla extract Enhances the chocolate flavor with subtle warmth
- Cocoa powder The star ingredient for intense chocolate flavor look for Dutch processed for deeper color
- All purpose flour Just enough for structure without making brownies cakey
- Salt Balances the sweetness and enhances chocolate flavor
- For the Cookie Layer
- Unsalted butter Use room temperature for proper creaming
- Granulated sugar Creates crispness in the cookie layer
- Brown sugar Adds moisture and a caramel undertone to the cookies
- Large egg Provides structure and richness
- Vanilla extract Rounds out the flavor profile with warmth
- All purpose flour The foundation of good cookie structure
- Baking soda Creates the perfect rise in the cookie layer
- Salt Enhances flavors and balances sweetness
- Chocolate chips Choose semisweet for the perfect balance use chunks for more dramatic look
Step-by-Step Instructions
- Prepare Your Equipment
- Preheat your oven to 350°F and line your baking dish with parchment paper leaving some overhang for easy removal. I recommend using an 8x8 or 9x9 inch square pan for the perfect thickness.
- Create the Brownie Base
- Melt the butter completely either in the microwave or on the stovetop until just liquified but not hot. Whisk in sugar until incorporated then add eggs one at a time mixing thoroughly between additions. Add vanilla and stir until the mixture looks glossy and slightly thickened about 30 seconds of vigorous whisking.
- Develop the Chocolate Flavor
- Sift cocoa powder directly into the wet ingredients to prevent lumps. This step is crucial for smooth texture fold gently but thoroughly to incorporate all the cocoa. Add flour and salt mixing just until no dry streaks remain overmixing will make tough brownies.
- Prepare the Cookie Dough
- Cream the softened butter with both sugars until light and fluffy about 3 minutes with an electric mixer. The mixture should look pale and have increased in volume. This creates the perfect cookie texture so do not rush this step.
- Build Cookie Structure
- Add the egg and vanilla to the creamed mixture beating until completely incorporated and the mixture looks smooth and silky. Scrape down the sides of the bowl to ensure even mixing.
- Complete the Cookie Dough
- Gradually add flour baking soda and salt mixing on low speed just until combined. Overmixing develops gluten which creates tough cookies. Fold in chocolate chips by hand using a spatula ensuring even distribution throughout the dough.
- Assemble Your Brookies
- Spread the brownie batter evenly in your prepared pan creating a level base. Take generous spoonfuls of cookie dough and flatten them slightly between your palms before placing them on top of the brownie batter. Continue until the surface is covered with cookie dough pieces leaving small gaps.
- Create Marbled Effect
- Gently press the cookie dough into the brownie batter slightly. For a more marbled appearance use a butter knife to swirl the layers together in a few places but dont overdo it you want distinct layers.
- Bake to Perfection
- Bake in the preheated oven for 30 to 35 minutes. The perfect brookie will have crisp edges with a center that is set but still slightly soft. A toothpick inserted in the center should come out with a few moist crumbs but not wet batter.
- Cool Completely
- Allow your brookies to cool in the pan for at least 1 hour. The cooling process is essential for the layers to set properly and flavors to develop. Lift out using the parchment paper overhang and slice into squares.
 Bookmark
The cocoa powder is truly the secret weapon in this recipe. I once tried to substitute hot chocolate mix in a pinch, and while the brookies were still tasty, they lacked that deep, rich chocolate intensity that makes this dessert so memorable. My husband still talks about the "real" version and how nothing else compares!
Storage and Freezing
These brookies actually taste even better on day two after the flavors have had time to meld together. Store them in an airtight container at room temperature for up to 5 days. Place pieces of parchment paper between layers to prevent sticking.
For longer storage freeze cut brookies in a single layer until solid then transfer to a freezer bag removing as much air as possible. They'll keep for up to 3 months. Thaw at room temperature for about an hour before serving or microwave individual pieces for 15 to 20 seconds for that fresh baked warmth.
Creative Variations
The basic brookie recipe is just the beginning of your dessert adventure. Try adding a layer of caramel between the brownie and cookie layers for a decadent twist. For mint chocolate lovers add 1/4 teaspoon of peppermint extract to the brownie layer and use mint chocolate chips in the cookie dough.
White chocolate chip cookie dough paired with dark chocolate brownies creates a beautiful contrast. During holiday seasons incorporate seasonal candies like chopped peanut butter cups for Halloween or crushed candy canes for Christmas.
Serving Suggestions
Transform these brookies into an epic dessert by serving them warm with a scoop of vanilla ice cream and a drizzle of hot fudge sauce. For coffee lovers these make the perfect afternoon treat paired with a latte or cappuccino.
For elegant dinner parties cut brookies into small squares and serve on a dessert platter with fresh berries and whipped cream. They also make wonderful gifts package a few squares in a decorative tin lined with parchment paper for a homemade treat that shows you care.
Recipe FAQs
- → Can I make these chocolate chip cookie brownies ahead of time?
Absolutely! These bars can be made 1-2 days in advance and stored in an airtight container at room temperature. For longer storage, refrigerate for up to 5 days or freeze for up to 3 months.
- → How do I know when the brookies are fully baked?
Look for set edges and a slightly gooey center. A toothpick inserted into the center should come out with a few moist crumbs, but not wet batter. Remember they will continue to set as they cool.
- → Can I add nuts to this dessert?
Yes! Add 1/2 cup of chopped walnuts or pecans to either the brownie batter or the cookie dough (or both) for added texture and flavor.
- → How should I cut these for serving?
For clean cuts, allow the brookies to cool completely. Use a sharp knife, cleaning the blade between cuts. For extra precision, refrigerate them for 30 minutes before cutting.
- → Can I use boxed brownie mix as a shortcut?
Yes, you can substitute the homemade brownie batter with your favorite boxed mix. Prepare according to package directions, then proceed with adding the cookie dough and baking as instructed.
- → What's the best way to serve these cookie brownies?
They're delicious on their own, but for an extra indulgent treat, serve warm with a scoop of vanilla ice cream on top. A drizzle of chocolate or caramel sauce takes them to the next level!