
 Bookmark
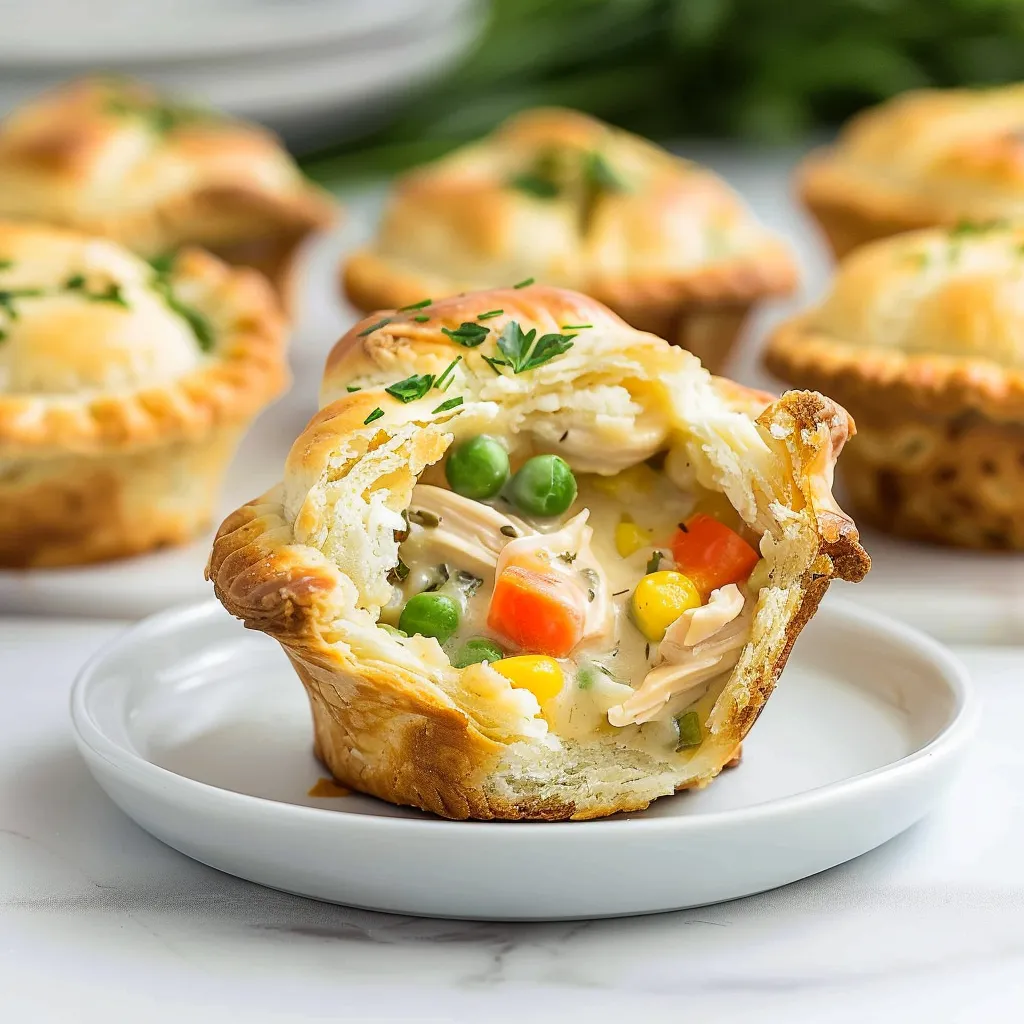
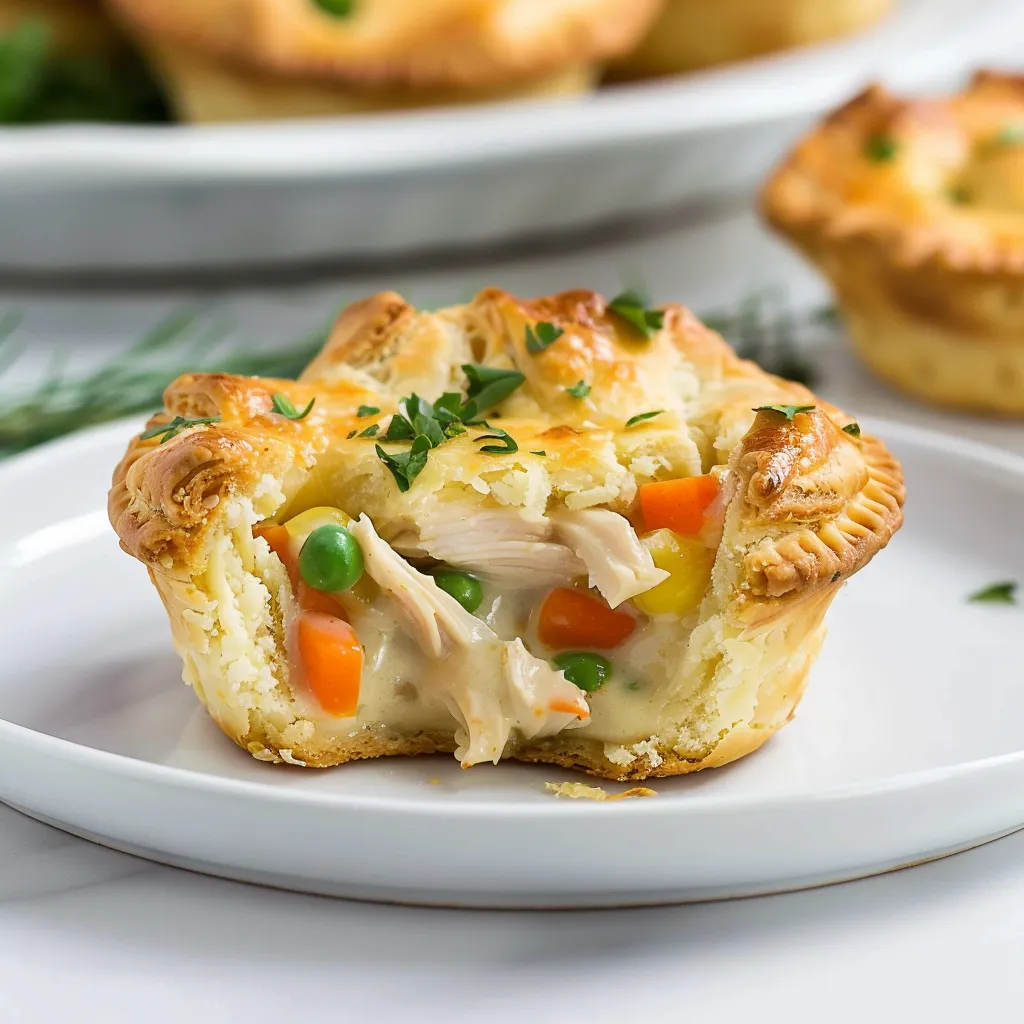
This irresistible mini chicken pot pie recipe transforms the classic comfort food into adorable single-serving treats that deliver all the creamy, savory goodness of traditional pot pie in a perfectly portioned package. The combination of tender chicken, vegetables, and flaky puff pastry creates a meal that feels special enough for guests yet simple enough for weeknight dinners.
I first made these when hosting a casual dinner party where I wanted something elegant but not fussy. The guests were so impressed by the individual servings that I now make them regularly for family meals when we need a comforting boost.
Ingredients
- Boneless skinless chicken breasts: provide the protein foundation and remain tender when cooked properly. Look for plump pieces with no discoloration.
- Frozen mixed vegetables: offer convenience and consistent quality. Choose a premium blend with peas, carrots, and corn for best flavor and color.
- Unsalted butter: creates the base for the roux that thickens our filling. The quality matters here as it contributes to the rich flavor.
- All purpose flour: works with butter to create the thickening agent that gives the filling its perfect consistency.
- Low sodium chicken broth: allows you to control the saltiness while adding depth to the sauce. Homemade is best but boxed works well too.
- Heavy cream: adds luxurious richness to the filling. The fat content is important for the silky texture.
- Puff pastry sheets: create the flaky golden crust that makes these pot pies irresistible. All butter varieties offer the best flavor.
- Salt pepper and thyme: enhance all the flavors. Fresh thyme leaves provide the brightest flavor if available.
Step-by-Step Instructions
- Prepare The Oven:
- Set your oven to preheat at 400°F ensuring it reaches the proper temperature before baking. This high heat creates the perfect environment for the pastry to puff dramatically and achieve that golden brown exterior while cooking the filling thoroughly.
- Cook The Chicken:
- Melt butter in a large skillet over medium heat until it begins to foam but not brown. Add the diced chicken pieces ensuring they're cut into even small cubes for quick cooking and consistent texture in every bite. Cook until the chicken develops a golden exterior while remaining juicy inside approximately 8 minutes stirring occasionally.
- Add Vegetables:
- Introduce the frozen mixed vegetables directly to the skillet with the chicken. The residual heat will thaw and warm them through without overcooking preserving their color and nutritional value. Stir frequently for about 3 minutes until they lose their frostiness but remain vibrant.
- Create The Sauce:
- Sprinkle flour evenly over the chicken and vegetable mixture creating a light coating on all pieces. Cook for 1 minute to remove the raw flour taste then gradually add the chicken broth in small amounts whisking continuously to prevent lumps from forming. The mixture will transform before your eyes into a velvety sauce that coats the back of a spoon.
- Finish The Filling:
- Pour in the heavy cream and add thyme salt and pepper adjusting seasonings to your preference. Allow the mixture to simmer for 2 minutes until it reaches the perfect consistency neither too runny nor too thick. Remove from heat and let cool slightly which will further thicken the filling.
- Prepare The Pastry:
- Roll out the puff pastry sheets on a lightly floured surface to even thickness. Using a round cutter or small bowl cut circles about 1 inch larger than your muffin tin cavities to create the bases. Press these gently into the cups forming a shell with edges extending slightly above the rim.
- Fill The Pastries:
- Spoon the chicken filling generously into each pastry lined cup being careful not to overfill as the mixture will bubble during baking. Leave about ¼ inch space at the top to accommodate expansion and prevent overflow.
- Create The Tops:
- Either fold the overhanging pastry over the filling to create rustic lids or cut smaller circles from remaining pastry to create neat tops. If using separate tops press edges together with a fork to seal and cut a small vent in the center to release steam during baking.
- Bake To Perfection:
- Place the muffin tin on a baking sheet to catch any potential overflow. Bake in the preheated oven for 20 to 25 minutes watching carefully near the end of cooking time. The pastry should rise beautifully and develop a rich golden brown color indicating perfect doneness.
 Bookmark
The puff pastry is truly the star ingredient in this recipe. I discovered through many iterations that allowing it to remain cold until the moment it goes into the oven results in the most dramatic rise and flakiest texture. My grandmother taught me this technique and watching these little pies puff up in the oven reminds me of Sunday dinners at her house where pot pie was always a special treat.
Make Ahead Options
These mini pot pies offer excellent flexibility for busy schedules. You can prepare the filling up to three days in advance and store it in an airtight container in the refrigerator. When ready to serve simply bring the filling to room temperature before assembling with fresh pastry. For maximum convenience fully assemble the pies freeze them unbaked and then bake directly from frozen adding about 10 minutes to the cooking time. This approach ensures you always have a homemade meal ready for unexpected guests or hectic weeknights.
Customization Ideas
The beauty of these mini pot pies lies in their versatility. Try swapping chicken for leftover turkey after holidays or use diced ham for a different flavor profile. Vegetarian versions work wonderfully with mushrooms and white beans providing hearty texture in place of meat. For a seafood variation substitute cooked shrimp or salmon adding them at the very end of the filling preparation to prevent overcooking. You can also elevate the flavor with additions like leeks caramelized onions or a splash of white wine during the sauce creation phase.
Serving Suggestions
These adorable individual pot pies create an impressive presentation at the dinner table. Serve them alongside a simple green salad dressed with lemon vinaigrette to cut through the richness of the pastry. For special occasions pair with a glass of unoaked Chardonnay or light Pinot Noir that complements the creamy filling without overwhelming it. If serving as part of a larger spread consider offering cranberry sauce on the side which adds a delightful tangy contrast to the savory pies. For children a small cup of additional vegetables makes this a complete and balanced meal.
Recipe FAQs
- → Can I use rotisserie chicken instead of raw chicken breast?
Yes! Using pre-cooked rotisserie chicken is a great time-saver. Simply shred or dice about 2 cups of rotisserie chicken and add it when the recipe calls for the cooked chicken. Since it's already cooked, you'll just need to warm it through with the vegetables.
- → How can I make these mini pot pies ahead of time?
You can prepare the filling up to 2 days ahead and store it in the refrigerator. When ready to serve, bring the filling to room temperature, assemble with fresh puff pastry, and bake. Alternatively, you can fully assemble the unbaked pies, freeze them solid, then transfer to freezer bags for up to 3 months. Bake from frozen, adding 10-15 minutes to the baking time.
- → What can I substitute for heavy cream?
Half-and-half or whole milk can work as lighter alternatives, though the filling won't be quite as rich. For a dairy-free option, full-fat coconut milk provides similar creaminess. You could also use evaporated milk for a middle-ground option that maintains creaminess with less fat.
- → Can I use pie crust instead of puff pastry?
Absolutely! Traditional pie crust works beautifully and provides a more classic pot pie texture. You can use store-bought or homemade pie crust - just follow the same assembly instructions. The baking time might vary slightly, so watch for golden-brown color as your indicator of doneness.
- → What sides pair well with these mini chicken pot pies?
These mini pot pies pair wonderfully with simple green sides like a garden salad, steamed broccoli, or sautéed green beans. For a heartier meal, serve with roasted root vegetables, mashed potatoes, or buttered corn. A light cranberry sauce or apple chutney can also add a lovely sweet-tart contrast.
- → How do I prevent the bottoms from getting soggy?
To prevent soggy bottoms, make sure your filling has cooled slightly before assembling the pies. You can also blind-bake the pastry shells for about 5 minutes before adding filling. Another trick is to sprinkle a thin layer of breadcrumbs or parmesan cheese at the bottom of each pastry cup to create a barrier between the filling and dough.