
 Bookmark
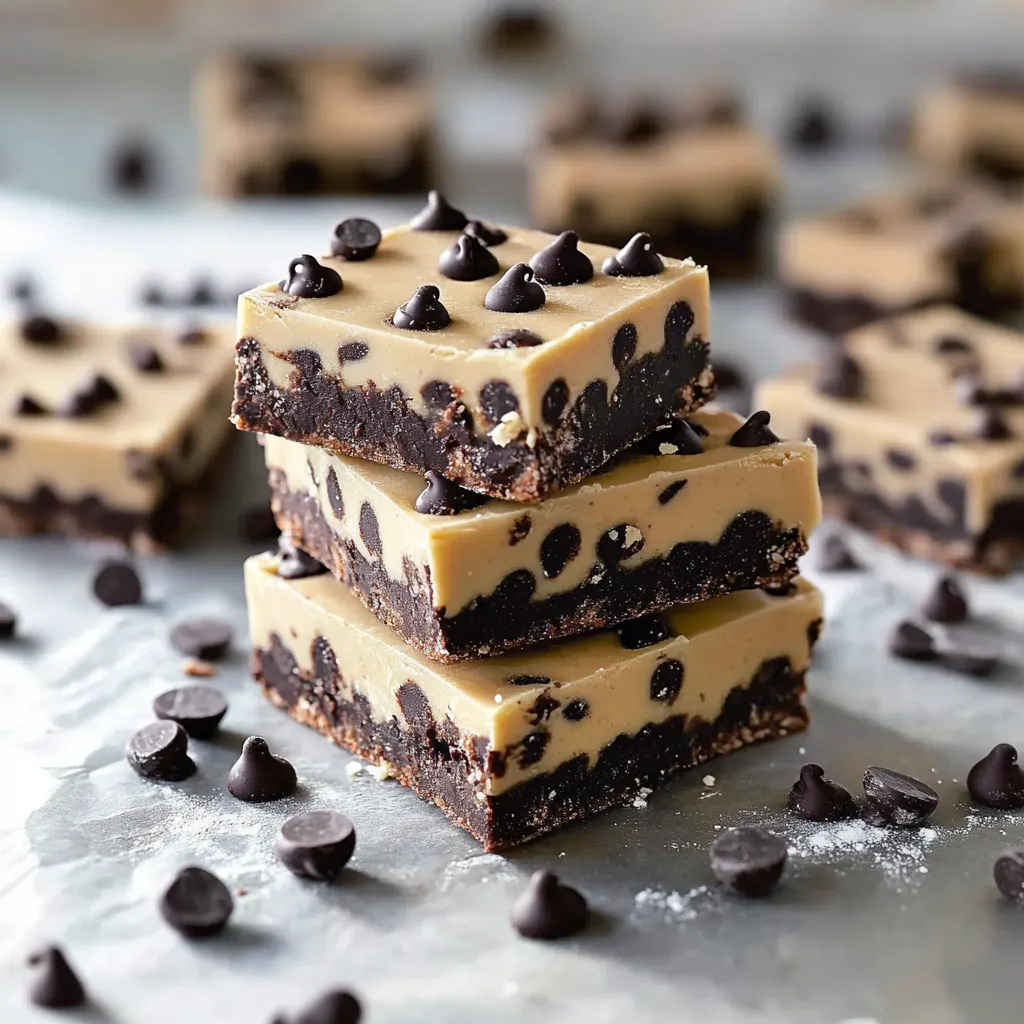
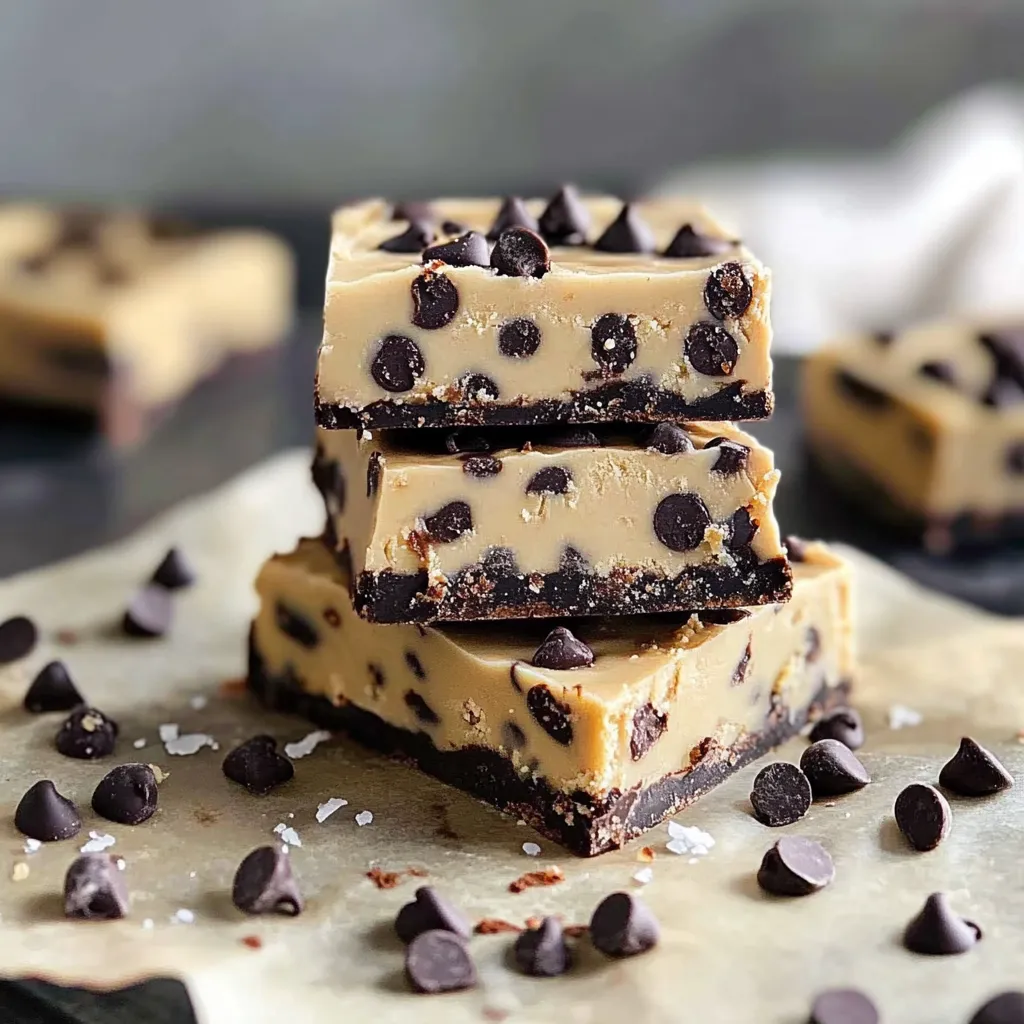
These no-bake cookie dough bars satisfy that irresistible craving for raw cookie dough without the worry of raw eggs. Perfect for those moments when you want the joy of cookie dough straight from the bowl but in a safe, sliceable form that everyone can enjoy.
I created these bars during a summer heatwave when turning on the oven seemed unbearable. My nephew declared them better than actual cookies, and they've become our go-to dessert for potlucks and playdates.
Ingredients
- All-purpose flour gives these bars their authentic cookie dough texture and must be heat-treated for safety
- Unsalted butter creates richness and allows you to control the salt level in your final product
- Brown sugar provides that classic cookie dough flavor with hints of molasses
- Granulated sugar balances the brown sugar and adds the perfect sweetness
- Milk binds everything together. whole milk creates the richest texture but any variety works
- Vanilla extract use pure rather than imitation for the best flavor profile
- Salt enhances all the flavors and balances the sweetness
- Mini chocolate chips distribute more evenly throughout the dough than regular chips
Step-by-Step Instructions
- Heat-Treat The Flour
- This crucial safety step eliminates any bacteria that might be present in raw flour. Microwave your flour for 1-2 minutes, stirring halfway through to ensure even heating. Let it cool completely before using or it will melt your butter and chocolate chips. The internal temperature should reach 165°F for safety.
- Create The Base
- Combine your melted butter with both sugars, stirring until the mixture becomes slightly lighter in color and the sugars begin to dissolve. This creates the foundation of flavor. Add the milk, vanilla, and salt, whisking until completely smooth. The mixture should look like a thin caramel at this stage.
- Form The Dough
- Gradually add the cooled, heat-treated flour to your wet ingredients, about 1/2 cup at a time. Stir gently between additions until fully incorporated. The dough will transform from a wet mixture to a soft, scoopable consistency that resembles traditional cookie dough. If it seems too dry or crumbly, add additional milk one tablespoon at a time.
- Add Chocolate Chips
- Fold in the mini chocolate chips using a gentle hand to avoid overworking the dough. Distribute them evenly throughout for chocolate in every bite. The dough should be at room temperature or slightly cool to prevent the chips from melting.
- Press And Chill
- Line your pan with parchment paper, leaving overhang on the sides for easy removal. Press the dough firmly and evenly into the pan, using the back of a measuring cup to create a smooth, level surface. Refrigerate for at least two hours to fully set the bars and develop the flavors.
 Bookmark
The mini chocolate chips are my secret weapon in this recipe. Unlike regular chips, they distribute more evenly throughout each bite, ensuring the perfect chocolate-to-dough ratio. My daughter once counted 12 chips in a single bite and declared it "mathematical perfection."
Storage Solutions
These cookie dough bars keep beautifully in an airtight container in the refrigerator for up to a week, though they rarely last that long in my house. For longer storage, cut the bars into individual portions and freeze them with parchment paper between layers. This allows you to thaw just what you need when the cookie dough craving strikes. Let frozen bars thaw in the refrigerator for about an hour before serving.
Creative Variations
The basic recipe serves as a perfect canvas for countless variations. Try white chocolate chips and dried cranberries for a festive holiday version. Peanut butter chips and a swirl of jam create PB&J cookie dough bars. For a cookies and cream variation, fold in crushed Oreos instead of chocolate chips. My family's favorite twist includes toasted pecans and a drizzle of caramel over the top before chilling.
Serving Suggestions
While these bars are delicious on their own, they reach new heights when served as part of a dessert experience. Try crumbling them over vanilla ice cream for a cookie dough sundae. Cut them into tiny squares and use them as the base for mini ice cream sandwiches. For an elevated dessert platter, pair them with fresh berries and a dollop of whipped cream. At birthday parties, I serve them alongside a glass of cold milk with paper straws for the perfect nostalgic treat.
Recipe FAQs
- → Why do you need to heat treat the flour?
Heat treating the flour kills any potentially harmful bacteria (like E. coli) that might be present in raw flour. This makes the cookie dough safe to eat without baking. You can microwave flour for 1-2 minutes or bake it at 350°F for 5-10 minutes until it reaches 165°F internally.
- → Can I use almond flour instead of all-purpose flour?
Yes, almond flour can be substituted for a gluten-free option. The texture will be slightly different—more dense and moist. You may need to adjust the amount since almond flour absorbs less moisture than all-purpose flour.
- → How long do these cookie dough bars last?
When properly stored in an airtight container in the refrigerator, these bars will last for up to one week. You can also freeze them for up to 3 months. Just thaw in the refrigerator before serving.
- → Can I add nuts or other mix-ins?
Absolutely! You can customize these bars with chopped nuts, sprinkles, crushed cookies, or other flavor chips like butterscotch or white chocolate. Just fold them in with or instead of some of the chocolate chips.
- → Why is my dough too dry or crumbly?
If your dough seems too dry, add milk one tablespoon at a time until you reach the desired consistency. Humidity and how the flour is measured can affect the moisture level of the dough. The final texture should be soft but hold together when pressed.
- → Can I make these dairy-free?
Yes, substitute the butter with coconut oil or a plant-based butter alternative, use dairy-free milk, and select dairy-free chocolate chips. The flavor profile will change slightly, but they'll still be delicious.