
 Bookmark
This classic French crepe recipe brings the charm of Parisian street food right to your kitchen with minimal effort. The delicate, paper-thin pancakes create the perfect canvas for both sweet and savory fillings, making them ideal for breakfast, brunch, or dessert any day of the week.
I first made these crepes for a Sunday brunch with friends, and they've become my signature dish whenever I want to impress without spending hours in the kitchen. The way everyone's faces light up when they see the crepes being flipped is truly magical.
Ingredients
- Eggs provide structure and richness to the batter
- All purpose flour creates the perfect texture without being too heavy
- Milk adds protein and helps create tender crepes
- Mineral water creates bubbles for lighter crepes than using all milk
- Vegetable oil prevents sticking and adds moisture
- Salt enhances all the flavors and balances sweetness in toppings
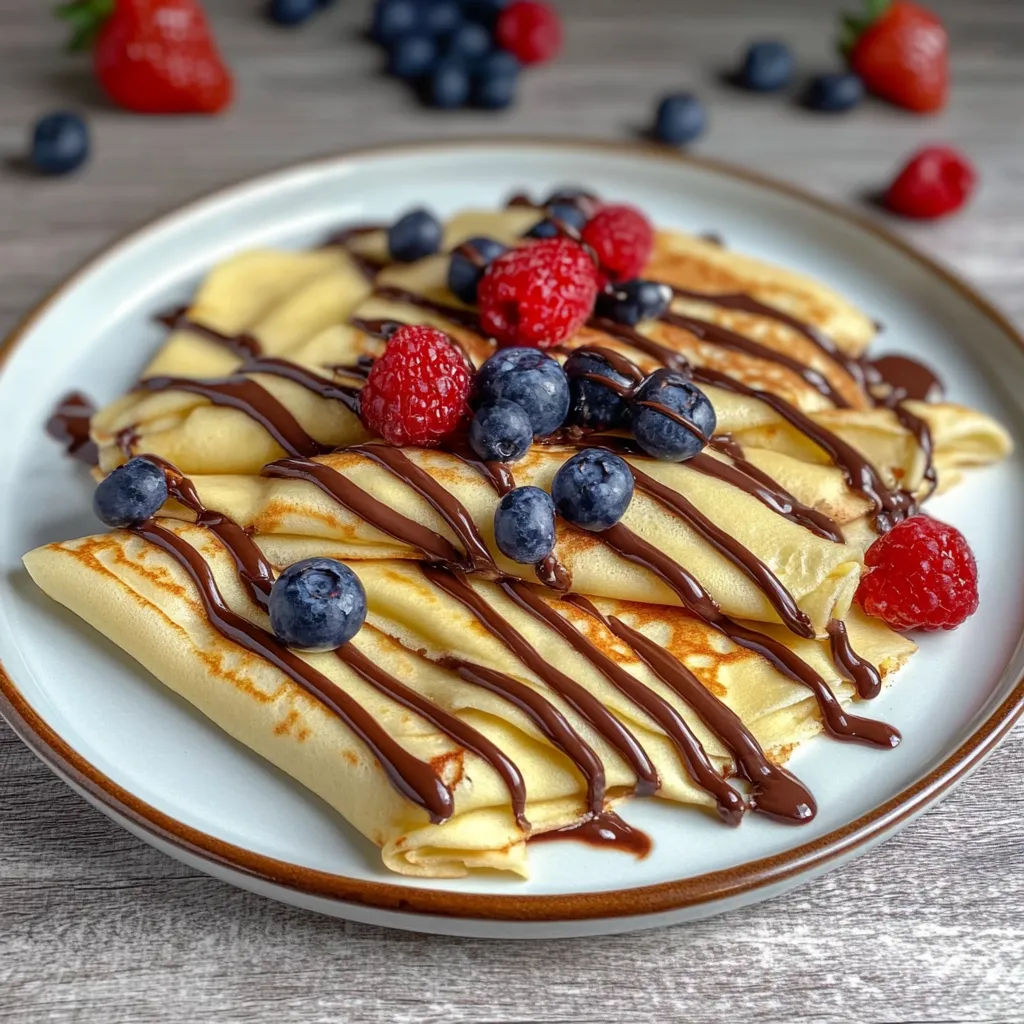
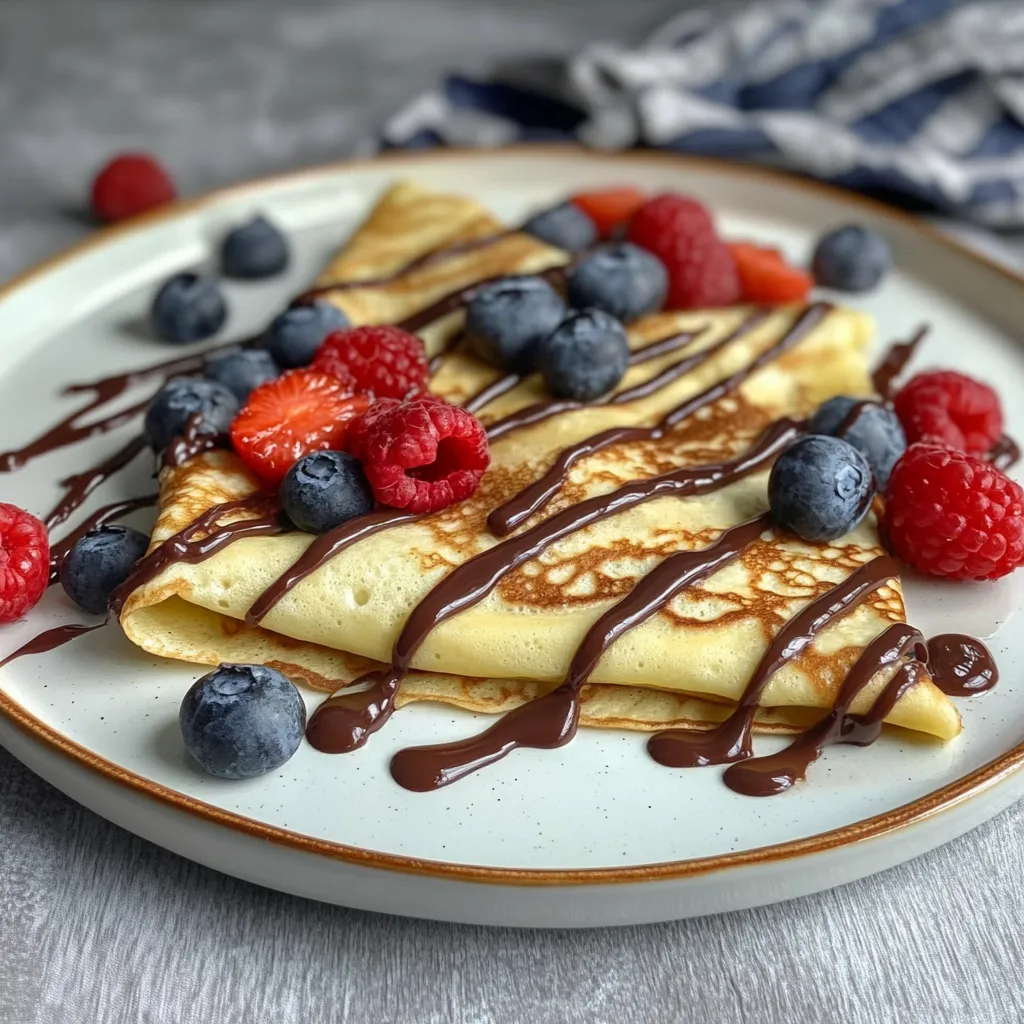
- Nutella and fresh fruits offer the perfect sweet finish
Step-by-Step Instructions
- Blend Ingredients
- Add all ingredients to a blender and pulse until completely smooth with no lumps. Let the mixture rest for 5 minutes which allows the flour to fully hydrate and the gluten to relax. This resting period is crucial for tender crepes that won't tear when flipping.
- Prepare the Pan
- While waiting for the batter to rest, heat a nonstick or crepe pan over medium high heat until it feels hot when you hold your hand a few inches above it. Dip a paper towel in vegetable oil and lightly coat the surface. The oil should be a very thin layer just to prevent sticking without making the crepes greasy.
- Cook the Crepes
- Pour approximately 1/4 cup of batter into the center of the hot pan, immediately lifting and tilting the pan in a circular motion to spread the batter evenly into a thin layer. Work quickly as the batter starts setting almost immediately. Cook until the edges begin to brown slightly and the top loses its wet sheen, approximately 1 to 2 minutes.
- Flip the Crepe
- Gently run a thin spatula around the edges to ensure nothing is sticking, then confidently slide it underneath and flip the crepe with one quick motion. The second side needs less time, usually about 1 minute, until light golden spots appear. The first crepe is often a practice run, so don't worry if it isn't perfect.
- Serve
- Transfer each finished crepe to a plate and cover with a clean kitchen towel to keep warm while you cook the remaining batter. For a special presentation, fold each crepe into quarters or roll them up after adding fillings.
- Add Toppings
- Spread a thin layer of Nutella on each warm crepe and add sliced fresh fruits like strawberries, bananas, or raspberries before folding or rolling. The heat from the crepe will slightly melt the Nutella, creating a heavenly combination.
 Bookmark
My grandmother taught me to add mineral water instead of using all milk, a secret she brought from her childhood in southern France. She always said the bubbles create air pockets that make the crepes almost float off the plate. Every time I make them, I think of her kitchen filled with the aroma of butter and sugar.
Make Ahead and Storage
The crepe batter actually improves with a longer rest in the refrigerator, making this perfect for planning ahead. You can prepare the batter up to 24 hours in advance and store it covered in the refrigerator. Just give it a quick stir before using as some separation may occur. Cooked crepes can be stacked with small pieces of parchment paper between them, wrapped tightly in plastic, and refrigerated for up to three days or frozen for two months.
Sweet vs. Savory Variations
While this recipe showcases sweet crepes with Nutella and fruit, you can easily adapt it for savory versions. Simply reduce the sugar to a pinch and add herbs like chopped chives or thyme to the batter. Fill savory crepes with ham and Gruyère cheese, sautéed mushrooms with herbs, or smoked salmon with cream cheese and dill. The versatility of crepes makes them perfect for serving as multiple courses in one meal.
The Art of Perfect Crepes
Achieving professional looking crepes comes down to three critical factors: batter consistency, pan temperature, and confidence. The batter should be the consistency of heavy cream, coating the back of a spoon but running off easily. If it seems too thick, add a tablespoon of water or milk at a time until corrected. Your pan should be hot enough that a drop of water sizzles on contact but not so hot that it immediately evaporates. Finally, be confident when pouring and swirling the batter and especially when flipping the crepes. Hesitation usually leads to tears or uneven cooking.
Recipe FAQs
- → Why do you need to let the batter rest?
Resting the batter for at least 5 minutes allows the flour to fully hydrate and the gluten to relax, which results in more tender pancakes. It also gives time for air bubbles to rise to the surface, creating a smoother texture when cooked.
- → Can I make the batter ahead of time?
Yes, you can prepare the batter up to 24 hours in advance and store it covered in the refrigerator. This actually improves the texture. Just give it a quick stir before cooking.
- → What's the best pan to use for cooking crepes?
A dedicated crepe pan works best as it has low sides for easy flipping, but any good quality non-stick skillet with a flat bottom will work well. The key is even heat distribution and a non-stick surface.
- → How do I know when to flip the crepe?
The crepe is ready to flip when the top surface no longer looks wet and the edges begin to brown slightly. This typically takes 1-2 minutes. When you run a spatula around the edge, it should lift easily.
- → What other toppings work well besides Nutella and fruit?
Sweet options include lemon juice and sugar, maple syrup, honey, jam, or whipped cream. For savory variations, try ham and cheese, sautéed vegetables, or smoked salmon with cream cheese.
- → Can I freeze cooked crepes?
Yes, cooled crepes can be stacked with parchment paper between each one, wrapped well, and frozen for up to 2 months. Thaw in the refrigerator and warm briefly in a pan or microwave before serving.