
 Bookmark
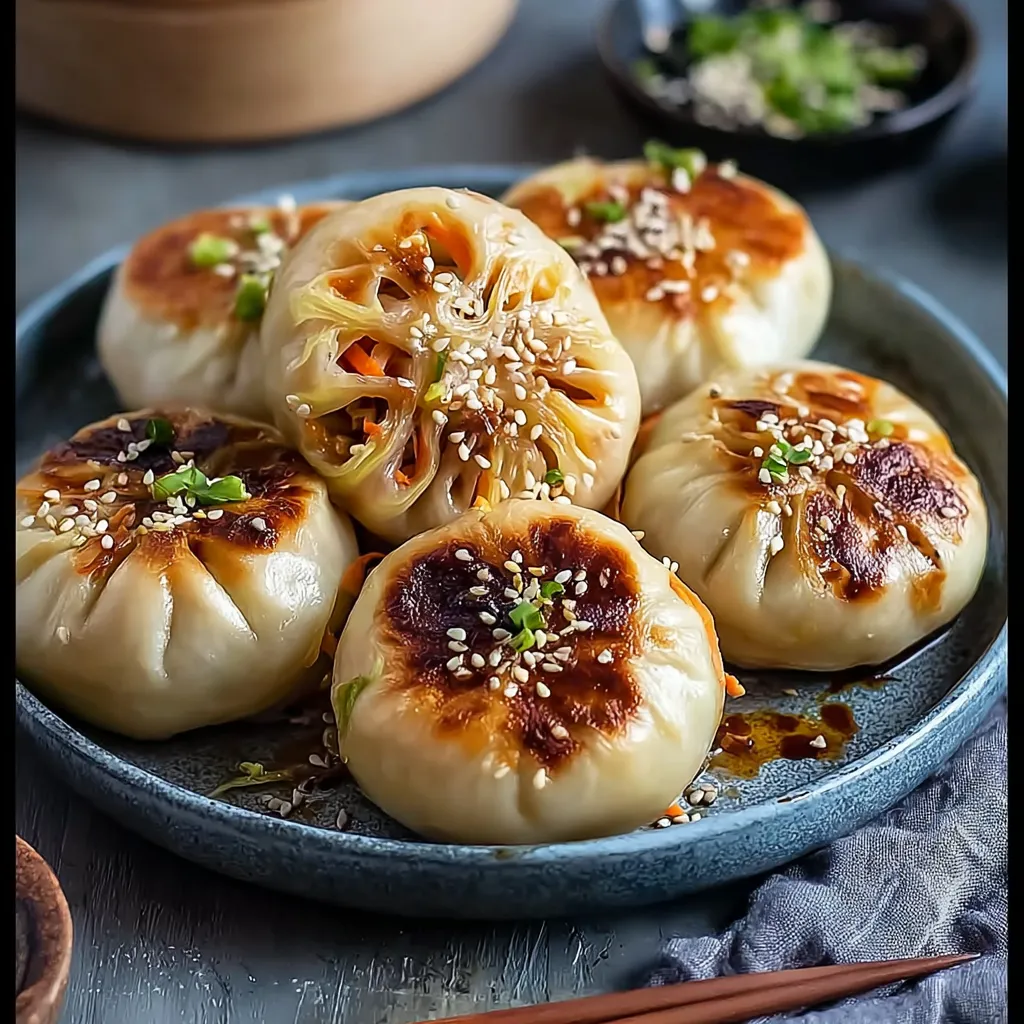
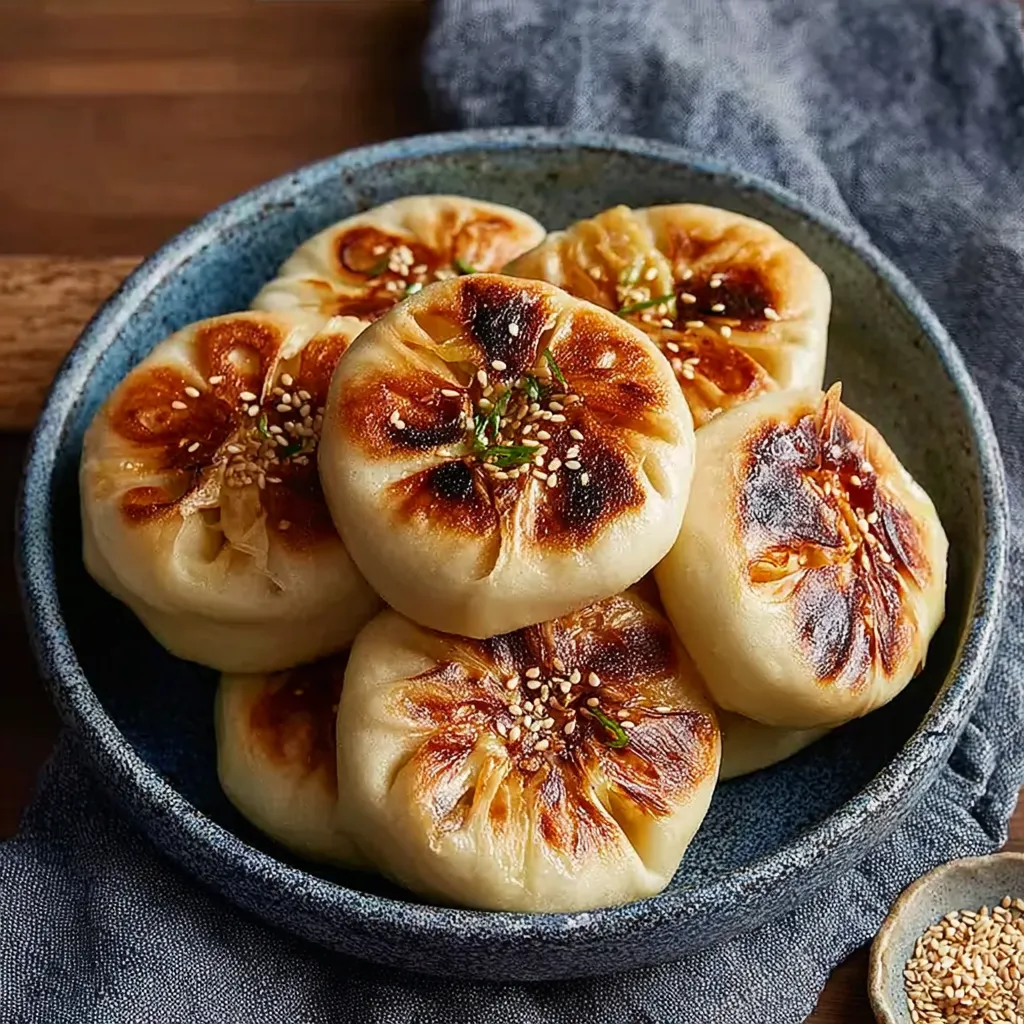
This Pan-Fried Cabbage and Noodle Buns recipe transforms humble cabbage into delicious handheld pockets that combine soft bread with a savory filling. The contrast between the crispy bottom and tender top creates an irresistible texture that will keep you coming back for more.
I first made these buns during a particularly tight grocery budget month and was amazed at how something so simple could taste so complex. My skeptical teenagers now request these weekly as their favorite after-school snack.
Ingredients
- Dough
- All purpose flour forms the base of our soft yet sturdy dough
- Instant dry yeast provides quick reliable rise without proofing first
- Sugar feeds the yeast and adds subtle sweetness to balance the savory filling
- Salt enhances all flavors in the dough
- Roasted sesame seeds add nutty crunch and visual appeal
- Warm soy milk creates a tender texture and subtle umami note
- Toasted sesame oil infuses the dough with aromatic nuttiness
- Filling
- Neutral oil for cooking without competing with filling flavors
- Shredded cabbage provides the bulk of our filling with sweet earthy notes
- Vermicelli noodles add satisfying chew and help bind ingredients together
- Grated carrot introduces natural sweetness and beautiful color
- Chopped scallions or chives deliver bright onion flavor without overpowering
- Soy sauce contributes essential umami depth and seasoning
- Salt enhances all the vegetable flavors
- Roasted sesame seeds add texture and visual interest
- Toasted sesame oil finishes the filling with rich nutty aroma
Step-by-Step Instructions
- Mix the Dry Ingredients
- Combine flour yeast sugar salt and sesame seeds in a large bowl with a whisk ensuring even distribution of the yeast and other small ingredients for consistent flavor and rise throughout the dough
- Create the Dough
- Form a well in the center of your dry ingredients and pour in the warm soy milk and sesame oil stirring with a wooden spoon until a shaggy dough forms then switch to using your hands to bring everything together into a cohesive ball making sure no dry flour remains at the bottom of the bowl
- Rise Time
- Cover your dough ball with a damp kitchen towel not plastic wrap as the moisture from the towel helps prevent the dough from drying out and let it rise for at least 2 hours in a warm spot until noticeably puffy and approximately doubled in size which develops flavor and ensures tender buns
- Prepare the Noodles
- Soak vermicelli in boiling water for exactly 7 to 8 minutes until they are soft but still slightly chewy then drain immediately to prevent overcooking and chop into smaller pieces about 1 to 2 inches long so they incorporate easily into the filling
- Cook the Vegetables
- Heat oil in a large skillet over medium high heat add scallions carrots and cabbage all at once and cook for 4 to 5 minutes stirring frequently until vegetables have softened and reduced in volume but still retain some texture which provides the perfect balance of tenderness and bite
- Combine the Filling
- Add the chopped vermicelli soy sauce salt and sesame oil to the vegetable mixture stirring thoroughly to ensure even distribution of flavors then continue cooking for 2 to 3 more minutes allowing the noodles to absorb the seasonings and excess moisture to evaporate
- Drain and Cool
- Transfer the hot filling to a strainer set over a bowl and press gently with the back of a spoon to remove excess liquid which could make your buns soggy then spread on a plate to cool completely as hot filling would kill the yeast in your dough
- Portion the Dough
- Punch down the risen dough to release air bubbles then divide into 12 to 16 equal pieces depending on your preferred size weighing approximately 50g or 38g each and roll each piece into a smooth ball by cupping your hand over the dough and moving in circular motions on an unfloured surface
- Form the Buns
- Roll each dough ball on a lightly floured surface into a 3 to 5 inch round keeping the center slightly thicker than the edges place 2 to 3 tablespoons of filling in the center then bring the edges up around the filling pleating as you go and pinch firmly at the top to seal completely
- First Fry
- Heat 1 tablespoon of oil in a nonstick pan over medium heat place 4 buns pleat side down in the pan gently pressing to flatten slightly and cook for 4 to 5 minutes until the bottoms develop a deep golden crust which provides textural contrast to the soft top
- Flip and Steam
- Flip the buns carefully to brown the tops briefly for about 1 minute then add 1 tablespoon of water per bun directly to the pan and immediately cover with a tight fitting lid allowing the buns to steam for 5 to 6 minutes until the water evaporates completely and the dough is fully cooked through
 Bookmark
The humble cabbage is truly the star of this recipe. I discovered the magic of cabbage buns during a trip to Eastern Europe where street vendors sold similar treats. What impressed me most was how something so economical could taste so luxurious. Now whenever cabbage goes on sale I make a double batch of these buns to stock my freezer.
Make Ahead Options
These buns are perfect for meal prep. You can prepare the filling up to 3 days ahead and store it in the refrigerator in an airtight container. The dough can be made the night before and allowed to rise slowly in the refrigerator which actually improves flavor development. You can also freeze the shaped uncooked buns on a baking sheet then transfer to a freezer bag once solid. When ready to cook simply thaw at room temperature for about 30 minutes before pan frying.
Perfect Pairings
Serve these buns with a simple dipping sauce made from equal parts rice vinegar and soy sauce with a touch of chili oil. For a complete meal pair with a light miso soup or a fresh cucumber salad dressed with rice vinegar and sesame oil. These buns also make excellent additions to lunch boxes as they taste great at room temperature and provide a satisfying alternative to sandwiches.
Troubleshooting Tips
If your dough seems too dry add a tablespoon of warm milk at a time until it comes together. Conversely if its too sticky dust with small amounts of flour until manageable. For filling that seems too wet squeeze firmly in a clean kitchen towel to remove excess moisture. If your buns burst during cooking the filling was likely too wet or you may have overfilled them. Make sure to pinch the seams very firmly when sealing to prevent leakage during cooking.
Recipe FAQs
- → Can I make these buns ahead of time?
Yes! You can prepare the dough and filling a day ahead and store them separately in the refrigerator. You can also shape the filled buns and refrigerate them (covered) for up to 24 hours before cooking. Alternatively, freeze the shaped uncooked buns on a tray, then transfer to a freezer bag for up to 1 month. Cook from frozen, adding a few extra minutes to the steaming time.
- → What dipping sauces work well with these buns?
These buns pair beautifully with several dipping options: try a simple mix of soy sauce, rice vinegar, and a dash of chili oil; a sweet and sour sauce; or a ginger-scallion sauce made with minced ginger, chopped scallions, oil, and a splash of vinegar.
- → Can I use different vegetables in the filling?
Absolutely! While cabbage provides the classic texture, you can substitute or add vegetables like finely chopped mushrooms, bell peppers, spinach, or bean sprouts. Just ensure any vegetables with high water content are properly drained after cooking to prevent soggy buns.
- → How do I know when the buns are fully cooked?
The buns are done when they have a golden-brown bottom, slightly browned top, and the dough has fully cooked through. When you press the side of a bun gently, it should feel firm but slightly springy, not doughy. The steaming stage is crucial - make sure all the water has evaporated before removing from the pan.
- → Can I make these buns gluten-free?
Yes, you can adapt this recipe using a gluten-free flour blend designed for bread or dumpling making. You'll also need to use rice vermicelli (which is naturally gluten-free) and ensure your soy sauce is gluten-free. The texture will be slightly different but still delicious.
- → What's the best way to reheat leftover buns?
For the best texture when reheating, warm a skillet over medium-low heat with a small amount of oil. Place the buns in the pan, add a tablespoon of water per bun, cover immediately, and steam for 3-4 minutes until heated through. This method preserves the crispy bottom while reheating the filling.