
 Bookmark
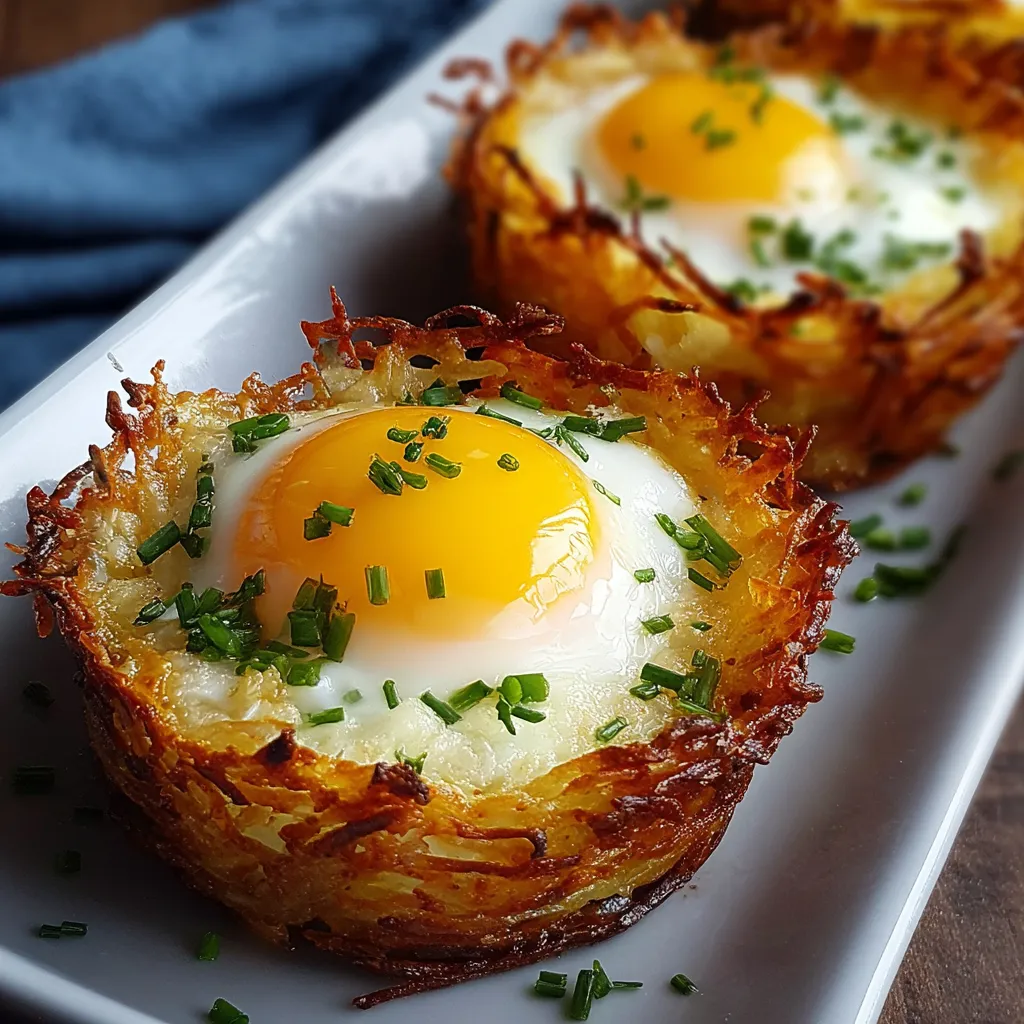
These crispy hash brown cups filled with perfectly baked eggs have become my go-to brunch centerpiece whenever I want to impress guests without spending hours in the kitchen. The contrast between the crunchy potato exterior and the creamy egg center creates a delightful textural experience that everyone loves.
I first made these for a family brunch when my in laws visited and they were such a hit that my father in law. who rarely comments on food. asked for the recipe. Now they appear at nearly every special breakfast gathering we host.
Ingredients
- Refrigerated hash browns ensure consistent results and save precious prep time
- Cheddar cheese adds rich flavor and helps bind the potato cups together
- Unsalted butter creates that irresistible golden crispy exterior on the hash browns
- Large eggs provide the perfect protein rich filling
- Salt and pepper enhance all the flavors without overpowering
- Fresh chives add a mild onion flavor and beautiful color contrast
Step-by-Step Instructions
- Prepare the Oven and Tin
- Preheat your oven to 400°F and thoroughly grease the muffin tin. Be generous with the cooking spray or butter to ensure easy removal later. Make sure to coat the sides well as this is where sticking typically occurs.
- Create the Hash Brown Mixture
- Combine the hash browns with melted butter and shredded cheese in a large bowl. The butter should be completely melted but not hot enough to cook the potatoes. Mix thoroughly until every shred of potato is coated. This ensures even browning and helps the cups hold their shape.
- Form the Hash Brown Cups
- Press the mixture firmly into each muffin cup creating an even layer on the bottom and sides. Use the back of a spoon to compact the mixture tightly against the walls of each cup. The more firmly pressed they are the better they will hold their shape when baked.
- Bake the Hash Brown Shells
- Bake for a full 25 minutes until the edges turn deep golden brown and crispy. The centers may look slightly lighter but should be set. This initial baking creates the structure needed to hold the eggs.
- Create Wells for the Eggs
- Remove from oven and immediately press down the centers to create deeper wells. Work quickly while the potato mixture is still hot and pliable. A shot glass or small measuring cup works perfectly for this step.
- Add the Eggs
- Crack one egg into each cup being careful not to break the yolks. Season each egg with salt and pepper according to your preference. For runny yolks use less baking time in the next step for firm yolks use the full time.
- Bake Until Eggs Set
- Return to the oven for the final bake. The whites should be completely set while the yolks can be cooked to your preference. For runny yolks check at 10 minutes for fully set yolks bake the full 15 minutes.
- Cool and Serve
- Let the cups cool in the tin for at least 10 minutes before attempting to remove them. This resting period allows them to set up properly. Run a knife around the edges before carefully lifting each cup out.
 Bookmark
I absolutely love using freshly shredded potatoes instead of packaged hash browns when I have extra time. The texture becomes even more remarkable and my kids always notice the difference. The first time I made these was for a holiday morning and now they've become our traditional Christmas breakfast.
Storage and Reheating
These egg hash brown cups store beautifully in the refrigerator for up to 3 days in an airtight container. To reheat microwave for 30 seconds or until warmed through. For best results reheat in a toaster oven at 350°F for about 5 minutes which helps restore some of the original crispiness to the hash brown cups.
Variations to Try
Transform this basic recipe by adding different ingredients to the hash brown mixture. Try mixing in cooked bacon bits crumbled sausage or diced bell peppers before baking. You can also experiment with different cheese varieties like pepper jack for heat or Swiss for a more sophisticated flavor profile. For the eggs consider adding a small spoonful of salsa cream cheese or even pesto before baking.
Serving Suggestions
These versatile cups pair beautifully with so many brunch companions. Serve alongside a fresh fruit salad for a complete meal or with avocado slices for healthy fat. For a more substantial spread add crispy bacon strips or sausage links on the side. I love setting up a topping bar with sliced green onions sour cream salsa and hot sauce so everyone can customize their own.
Recipe FAQs
- → Can I make these hash brown egg baskets ahead of time?
Yes! You can prepare the hash brown cups a day ahead and refrigerate them. When ready to serve, crack eggs into the cups and bake. Alternatively, fully prepare them, refrigerate for up to 3 days, and reheat in a 350°F oven for 8-10 minutes until warmed through.
- → How do I know when the eggs are perfectly cooked?
For runny yolks, bake for about 12 minutes after adding the eggs. For medium yolks, aim for 14 minutes, and for fully set yolks, bake for 15-16 minutes. Keep in mind that eggs will continue cooking slightly after removing from the oven.
- → Can I customize these breakfast cups with additional ingredients?
Absolutely! You can add diced bell peppers, crumbled bacon, or diced ham to the hash brown mixture. You can also sprinkle additional cheese, herbs, or even a small dollop of salsa on top of the eggs before baking.
- → What's the best way to remove the egg cups from the muffin tin?
Let them cool for at least 10 minutes after baking, which allows them to set. Then run a butter knife around the edges to loosen, and gently lift them out using the knife or a small spoon. Proper greasing of the muffin tin before baking is essential for easy removal.
- → Can I use frozen hash browns instead of refrigerated?
Yes, but you'll need to thaw and drain them first. Place frozen hash browns in a colander and let them thaw completely, then press out excess moisture using paper towels or a clean kitchen towel before mixing with other ingredients.
- → How should I store and reheat leftovers?
Store cooled egg cups in an airtight container in the refrigerator for up to 3 days. Reheat in a 350°F oven for 8-10 minutes until warmed through. Microwaving works in a pinch (about 30 seconds), but the hash browns won't stay as crispy.